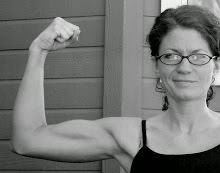
"Elephants eat BIIIIG elephant food, don't-cha-know?"
Monday, September 8, 2008
Elephant Breakfast
"Because elephants need breakfast too."
 "Elephants eat BIIIIG elephant food, don't-cha-know?"
"Elephants eat BIIIIG elephant food, don't-cha-know?"

Friday, September 5, 2008
Acrylic Halloween Scrapbook Album
Every year I *think* about making a haunted house scrapbook album for Halloween, but I never find the time, and before I know it, Halloween is over and done. This morning I have a bit of time and decided to get started.
 I am so excited! I'll be using my bed and breakfast acrylic album. Haven't decided if I'm going to sell this one or just keep it for myself. I'll post pictures of the finished project as soon as it's complete.
 I am so excited! I'll be using my bed and breakfast acrylic album. Haven't decided if I'm going to sell this one or just keep it for myself. I'll post pictures of the finished project as soon as it's complete.
Thursday, September 4, 2008
Losing weight. Slowly...
I'm not there yet, but I do feel like I've made a dent.
Where I started.
These before pictures were taken in the end of May 2008. I was one month post-pardom after a difficult and life changing pregnancy that ended in still birth at 24 weeks. I weighed about 153 lbs, and was completely out of shape after practically being confined to bed for the term of my pregnancy. I was about a size 12 - 14.
 Here is my current picture. Now I am well aware that the... um, decrease in my cup size, probably accounts for a good portion of my weight loss, so no need to comment on that little aspect.

Again, before picture - side view. Current picture side view.
 Now I'm at about 140 lbs. I am currently, and frustratingly, about 7 lbs over my pre-pregnancy weight. I am in the best aerobic shape of my life. I am running 3.2 miles and doing about 90 crunches a day. Physically I feel great. Visually, I'm not really satisfied with what I see. I am happy with the results I've achieved, I guess I just expected more, faster, with less effort because, 1. I wasn't pregnant for 9 months, just 6 months, and 2. I don't have a baby so I'm getting my sleep, and I have time to exercise. I just always assumed it took me 9 months to lose the pregnancy weight in the past because my body was hanging onto it because I was breastfeeding, and always exhausted so I couldn't exercise.
So now, here I am. About 7 lbs over pre-pregnancy weight and in a size 8/10. Frustrated, because I was a size 4, and 7 lbs should not equal 2-3 dress sizes. I know I'll eventually be there, and maybe even in better shape than I was pre-pregnancy, but for now I'm growing impatient.
To top it off, Baskin Robbins just emailed me and asked me to join the 2008 flavor debate.
Tempting but no...
Where I started.
These before pictures were taken in the end of May 2008. I was one month post-pardom after a difficult and life changing pregnancy that ended in still birth at 24 weeks. I weighed about 153 lbs, and was completely out of shape after practically being confined to bed for the term of my pregnancy. I was about a size 12 - 14.
 Here is my current picture. Now I am well aware that the... um, decrease in my cup size, probably accounts for a good portion of my weight loss, so no need to comment on that little aspect.
Again, before picture - side view.
 Current picture side view.
 Now I'm at about 140 lbs. I am currently, and frustratingly, about 7 lbs over my pre-pregnancy weight. I am in the best aerobic shape of my life. I am running 3.2 miles and doing about 90 crunches a day. Physically I feel great. Visually, I'm not really satisfied with what I see. I am happy with the results I've achieved, I guess I just expected more, faster, with less effort because, 1. I wasn't pregnant for 9 months, just 6 months, and 2. I don't have a baby so I'm getting my sleep, and I have time to exercise. I just always assumed it took me 9 months to lose the pregnancy weight in the past because my body was hanging onto it because I was breastfeeding, and always exhausted so I couldn't exercise.
 So now, here I am. About 7 lbs over pre-pregnancy weight and in a size 8/10. Frustrated, because I was a size 4, and 7 lbs should not equal 2-3 dress sizes. I know I'll eventually be there, and maybe even in better shape than I was pre-pregnancy, but for now I'm growing impatient.
To top it off, Baskin Robbins just emailed me and asked me to join the 2008 flavor debate.
Tempting but no...
Wednesday, September 3, 2008
Acrylic Scrapbook Album - House Template - Free!
Here's what you've been looking for!
My acrylic house template.
Copyright Camille McClelland 2007.
I am providing this template for personal use only. The design may not be mass manufactured. The design may not be used to teach classes without my express written permission. The design may not be produced for retail sale.
You MAY cut the album and decorate it for your own personal use, or as a gift. You may display the album in your local scrapbook store, PROVIDING the album template be marked "Copyright Camille McClelland 2007." Your finished album may be published, PROVIDING proper credit is established for the album template, and the template is marked "copyright Camille McClelland 2007."


Since the pages of this album are all different sizes it's easiest to cut out 3 or more of each page, resulting in 3 or more finished albums.
The graph paper I have used is marked in 1/4 inch increments, so 4 squares equals 1 inch.
 If you are a first time cutter, you may want to leave the window and door off of the album.
 To cut the door in the first page, cut up both sides of the door then across the top of the door. This cut can be very difficult. If you are having a hard time then sacrifice the door, keeping the rest of the page in good condition, and then use the template and cut a new door from a new piece of acrylic. You will have to work with the two pieces a bit till they fit together nicely. Don't worry about small flaws, as are shown in the picture below, they won't be noticeable when you finish the album.
 You will also notice only the first page has drill holes marked. Drill the holes in page one, and then use the entire page one stack of acrylic as a template to drill the holes in all of the other pages. Place the page one stack on top of the page two stack, aligning the bottom edge and left side of the pages as exactly as possible. Tape the two stacks tightly together. Feed the drill bit threw the drill holes on page one, and continue drilling into page two. You can drill all the way threw the page two stack in this manner, or you can drill just enough to mark the drill spots, and then separate the stacks and finish drilling page two separately.
Repeat for pages three and four.
 To cut out the windows use your drill press to drill a hole in the center of each window pane.
Then feed your scroll saw blade through the hole and complete each cut.

If you feel comfortable enough with your table saw, page three can be cut entirely on the table saw very quickly.


That's it!
If you need detailed instructions on cutting shaped acrylic albums, follow my guide links below.
1. Creating your template
2. Buying your acrylic and preparing to cut
3. Cutting the album
4. Finishing the edges and drilling binder ring holes
5. Separating and cleaning the pages
Still wanna make one, but not so sure on the cutting... check back soon. I am in the process of putting together complete kits including this album, step by step instructions, and all the paper and embellishments pre cut to make the finished gingerbread album. All for just $29.99! If you want to be on the waiting list post comments with your email address.
My acrylic house template.
Copyright Camille McClelland 2007.
I am providing this template for personal use only. The design may not be mass manufactured. The design may not be used to teach classes without my express written permission. The design may not be produced for retail sale.
You MAY cut the album and decorate it for your own personal use, or as a gift. You may display the album in your local scrapbook store, PROVIDING the album template be marked "Copyright Camille McClelland 2007." Your finished album may be published, PROVIDING proper credit is established for the album template, and the template is marked "copyright Camille McClelland 2007."


Since the pages of this album are all different sizes it's easiest to cut out 3 or more of each page, resulting in 3 or more finished albums.
The graph paper I have used is marked in 1/4 inch increments, so 4 squares equals 1 inch.
 If you are a first time cutter, you may want to leave the window and door off of the album.
 To cut the door in the first page, cut up both sides of the door then across the top of the door. This cut can be very difficult. If you are having a hard time then sacrifice the door, keeping the rest of the page in good condition, and then use the template and cut a new door from a new piece of acrylic. You will have to work with the two pieces a bit till they fit together nicely. Don't worry about small flaws, as are shown in the picture below, they won't be noticeable when you finish the album.
 You will also notice only the first page has drill holes marked. Drill the holes in page one, and then use the entire page one stack of acrylic as a template to drill the holes in all of the other pages. Place the page one stack on top of the page two stack, aligning the bottom edge and left side of the pages as exactly as possible. Tape the two stacks tightly together. Feed the drill bit threw the drill holes on page one, and continue drilling into page two. You can drill all the way threw the page two stack in this manner, or you can drill just enough to mark the drill spots, and then separate the stacks and finish drilling page two separately.
Repeat for pages three and four.
 To cut out the windows use your drill press to drill a hole in the center of each window pane.
Then feed your scroll saw blade through the hole and complete each cut.

If you feel comfortable enough with your table saw, page three can be cut entirely on the table saw very quickly.


That's it!
If you need detailed instructions on cutting shaped acrylic albums, follow my guide links below.
1. Creating your template
2. Buying your acrylic and preparing to cut
3. Cutting the album
4. Finishing the edges and drilling binder ring holes
5. Separating and cleaning the pages
Still wanna make one, but not so sure on the cutting... check back soon. I am in the process of putting together complete kits including this album, step by step instructions, and all the paper and embellishments pre cut to make the finished gingerbread album. All for just $29.99! If you want to be on the waiting list post comments with your email address.
Tuesday, September 2, 2008
St. Luke's Womens Fitness Celebration 5K run
 I'm registered!
It's my first 5k.
I'm worried I'll do alright.
To push myself, I signed up in the red competition wave.
If you're running please let me know, I'm looking for moral support.
Subscribe to:
Posts (Atom)